PTU Tutorial - Totally Emo
For this tutorial i am using the amazing artwork by @Zlata M
Which you can purchase from The PSP Project
~Supplies Needed~
Tube of choice
Scrapkit used was Totally made by Kristin which can be purchased from here
If you do not have this scrapkit then please use another of your choice
Template172 which was also made by Kristin and can be downloaded from here
Masks - Vix_BigMask001 which can be downloaded from here
~Filters Used~
Eye Candy 4 - Gradient Glow
DsbFlux - Bright Noise
~Font used~
Satisfaction
Let's Get Started
Open Kristin's template in psp - image - canvas size - set to 800 x 750 - fill the background layer with white - delete the credits layer & the circle layer
Copy & paste frame 2 as a new layer - resize - with your magic wand select the middle of the frame - selections - modify - expand by 4 - copy & paste a paper from the kit as a new layer - selections - invert - hit delete - selections - none - move below the frame layer
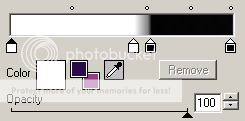
On the rounded rectangle layer go to selections - all - float - defloat - copy & paste a paper from the kit as a new layer - selections - invert - hit delete - selections - invert - selections modify - expand by 4 - set your colour palette to 2 colours from your tube - gradient - foreground/background - angle 45 - repeats 3 - on the original layer fill with your gradient - selections - none - effects - plugins - dsbflux - set to 50% - add a drop shadow
Merge together the red rectangle layers - selections - float - defloat - copy & paste a paper as a new layer - selections - invert - hit delete - selections - invert - selections modify - expand by 4 - on the original layer fill with your gradient {Use another colour from your tube} - selections - none - effects - plugins - dsbflux - apply the same settings as earlier - add a drop shadow
Merge together the light blue square layers - - selections - float - defloat - copy & paste a paper as a new layer - selections - invert - hit delete - selections - invert - selections modify - expand by 4 - on the original layer fill with your gradient {Use another colour from your tube} - selections - none - effects - plugins - dsbflux - apply the same settings as earlier - add a drop shadow
Merge together the grey square layers - - selections - float - defloat - copy & paste a paper as a new layer - selections - invert - hit delete - selections - invert - selections modify - expand by 4 - on the original layer fill with your gradient {Use another colour from your tube} - selections - none - effects - plugins - dsbflux - apply the same settings as earlier - add a drop shadow
Copy & paste the filmstrip frame as a new layer - with your mgaic wand select inside each of the frames - selections - modify - expand by 4 - copy & paste the black paper as a new layer {If you do not have a black paper, add a new raster layer & fill with black} - move below the frame layer - selections - none - With your magic wand again select the middle of the left frame - copy & paste your tube as a new layer - selections - invert - hit delete - selections - none - duplicate - image - mirror - do the same for the middle frames too - merge together all the tube layers - duplicate - change the blend mode on the original to luminance (L) - on the duplicate go to adjust - blur - gaussian blur - set to 3.00 - change the blend mode to screen - reduce opacity to around 90%
On the frame layer go to effects - plugins - eye candy - gradient glow - change the glow width to 3
add a drop shadow
Copy & paste the wordart as a new layer - resize to liking - move layer below your black frame background layer - effects - plugins - eye candy - gradient glow - apply the same settings as earlier - add a drop shadow
Copy & paste any other elements from the scrapkit you are using as new layers - apply the same gradient glow settings as earlier - add drop shadows
Add a new raster layer & move below all the other layers - fill with your gradient - layers - new mask from image - apply Vix's big mask - merge group - resize if needed
Copy & paste your tube as a new layer - position - duplicate - adjust - blur - gaussian blur - set to 3.00 - change the blend mode to screen - reduce the opacity to around 80% - on the original layer go to selections - all - float - defloat - selections modify - expand by 3 - add a new raster layer & move below your tube layer - fill with white - effects - plugins - dsbflux - bright noise - apply the same settings as earlier - add a drop shadow
With your font add your name - position - effects - plugins - dsbflux - bright noise - apply the same settings as earlier - also apply the same gradient glow as earlier - add a drop shadow
Don't forget to add the artists correct copyrite - save tag and you are done!


