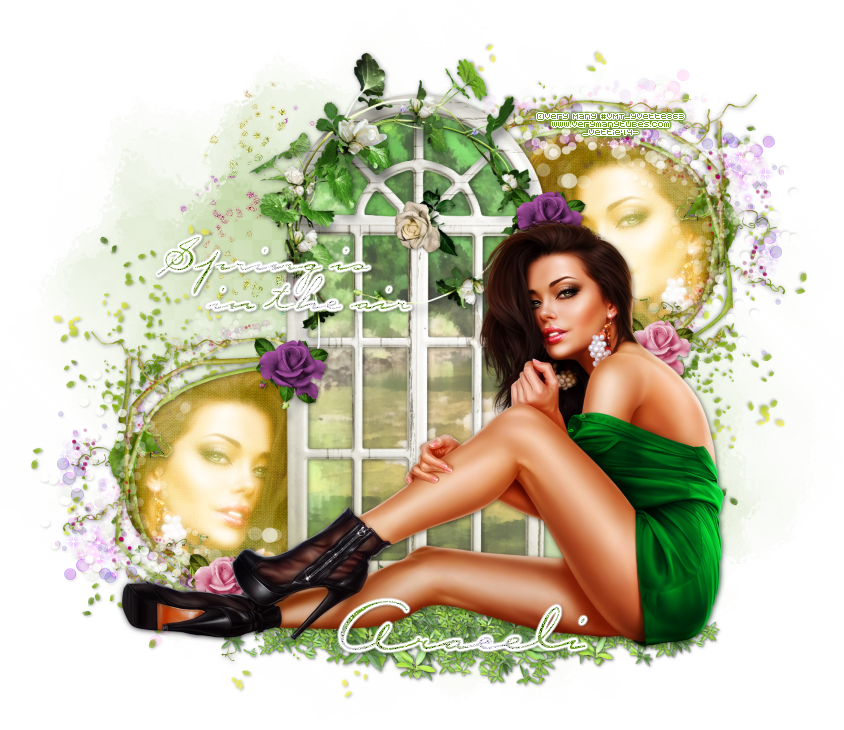
PTU Tutorial - Spring Is In The Air

For this tutorial i am using the amazing artwork by @Very Many
~Supplies Needed~
Tube of choice
Scrapkit used was A Kiss For Luck made by PinkParadox Productions which can be purchased from here
If you do not have this scrapkit please feel free to use another one with similar elements
BigMask made by Vix which can be downloaded from here
~Filters Used~
Eye Candy 4 - Gradient Glow
~Font used~
Carpenter Script
Let's Get Started
Open a 850 x 750 white canvas
Copy & paste frame 13 as a new layer - resize if needed - position to the center of your canvas - add a drop shadow - copy & paste paper 35 as a new layer - move below the frame layer - resize & position to liking - with your selection tool set to point to point draw around the edge of the frame - selections - invert - hit delete - selections - none - now your scenery will look like it's through the window :)
Copy & paste frame 10 as a new layer - position to the left - resize to liking & move below the wallpaper layer - with your selection tool again draw around the edge of the circle branch - copy & paste your tube as a new layer - resize & position - selections - invert - hit delete - selections - invert - copy & paste paper 22 as a new layer - selections - invert - hit delete - selections - none - move the paper below the tube layer & make sure both layers are below the frame layer - add a drop shadow to the frame - on the tube layer duplicate - adjust - blur - gaussian blur - 3.00 - change the blend mode to screen - on the original change the blend mode to luminance (L) - reduce opacity of both to liking - hide all layers expect for the frame, tubes & paper - merge together - unhide all layers - duplicate - image - mirror - position
Copy & paste your tube as a new layer - position & resize to liking - duplicate - adjust - blur - gaussian blur - 3.00 - change the blend mode to soft light - add a drop shadow
Copy & paste element 162 as a new layer - resize to liking - move below your tube layer - add a drop shadow - if need be duplicate it & position them side by side
Copy & paste element 180 as a new layer - resize to liking - position to the left of your tag - duplicate - image - mirror - image - flip - position
Copy & paste element 178 as a new layer - position to the right of your tag - resize - add a small drop shadow - duplicate - image - mirror - image - flip
Copy & paste any of the flowers as new layers - position them around your tag - add drop shadows
Add a new raster layer above your background layer - fill with a colour from your tube - layers - new mask from image - apply Vix's mask - merge group - resize if needed & reduce opacity to liking
With your foreground & background set to 2 colours from your tube - set your gradient to repeats 3 - angle 45 - with your font add some words, i added 'Spring Is In The Air' convert to raster - position - adjust - add/remove noise - set to 35 - random & monochrome selected - effects - plugins - eye candy 4 - gradient glow - glow width 3.00 - settings fat - add a drop shadow
With your font again, same settings, add your name & apply the same gradient glow - add a drop shadow
Don't forget to add the artists correct copyrite - crop around your tag - delete the white background layer and you are done!
