FTU Tutorial - Karma
~Supplies Needed~
Tube of choice
Scrapkit used was Karma 2 made by Kristin which can be downloaded for free from here
If you do not have this scrapkit please feel free to use another one
EOC_Template01.13 made by me which can be downloaded from here
Mask of choice, the one i am using is Becky%5FMask042. If you know who this mask belongs to can you please let me know then i can give them credit, thank you
~Filters Used~
Dsb Flux - Bright Noise
Eye Candy 4 - Gradient Glow
Mura's Meisters - Tone
Toadies - What Are You?
Xero - Radience
Penta.com - Jeans
~Font used~
Recorda Script
Let's Get Started
Open my template in psp - image - canvas size - resize to 800 x 750 - add a new raster layer - fill with white & move below all the other layers - delete the copyrite layer
On the frame back layer - selections - all - float - defloat - add a new raster layer - set your colour palette to 2 colours from your tube - set to gradient - foreground/background - angle 45 - repeats 3 - fill the new raster layer with the gradient - copy & paste your tube as a new layer - selections - invert - hit delete - selections - none - change the blend mode settings to Luminance (L) - effects - plugins - xero - radience
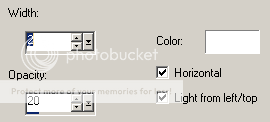
Effects - texture effects - blinds
On the frame layer add a drop shadow
On the black oval layer - selections - all - selections - float - defloat - add a new raster layer & fill with your gradient - add another new raster layer - effects - plugins - muras meisters - tone - change the top colour box to white
Reduce the opacity if you wish * delete the original oval layer
On the white oval layer - effects - texture effects - plugins - dsb flux - bright noise - set to 50% - on the blue oval layer - selections - all - float - defloat - add a new layer - fill with a colour from your tube - selections - none - add a drop shadow - delete the original layer
On the rounded rectangle layer - selections - all - float - defloat - add a new layer - fill with your gradient again - effects - plugins - penta.com - jeans
With the layer still selected add a new raster layer & move it below the gradient layer - fill with black - selections - none - effects - plugins - toadies - what are you?
Reduce the opacity to around 50% - Add a drop shadow to your gradient layer & delete the original layer
Unhide the small rounded rectangle layer - selections - all - float - defloat - add a new raster layer - fill with a colour from your tube - copy & paste your tube as a new layer - selections - invert - hit delete - selections invert - selections modify - expand by 5 - add a new raster layer below your fill layer - fill with white - selections - none - apply the same dsb flux bright noise settings as earlier - add a drop shadow - delete the original layer - on the tube layer duplicate - on the original change the blend mode to Luminance (L) - on the duplicate go to adjust - blur - gaussian blur - set to 3.00 - change the blend mode to screen - effects - texture effects - blinds - apply the same settings as earlier - hide all your layers apart from the tube layers, the small rectangle layer you filled & the white noise layer - merge visible - unhide layers - duplicate twice - rotate 1 at 40% left & the other at 90% left - position like mine {If any are slightly blurreed go to adjust sharpness-sharpen} - merge these 3 layers together - duplicate - image - mirror - image - flip - add drop shadows to both
Copy & paste your main tube as a new layer - position - i added a noise layer at the back of mine using the same process & settings as i did behind the small rectangle layers - duplicate your tube - adjust - blur - gaussian blur - set to 3.00 - change the blend mode to soft light - add a drop shadow to the original tube layer
Add a new raster layer and move it below all the other layers - fill with black - layers - new mask from image - apply your mask of choice - merge group - resize if needed
Copy & paste any elements from your scrapkit {I used the wordart, sparkles & splatter} - position them around your tag - add drop shadows
With your font add your name - position - effects - plugins - eye candy 4 - gradient glow - set the glow width to 3.00 & the colour boxes to match your tube
Add a drop shadow
Don't forget to add the artists correct copyrite - save tag and you are done!
Here is another version i did using the work of ©Keith Garvey -


