No Scraps Tutorial - One Of A Kind
For this tutorial i am using the amazing artwork by @Very Many
Which can be purchased from PicsForDesign
~Supplies Needed~
Tube of choice
Missy_tagtemplate414 made by Missy which can be found here
Wordart of choice, i used one from another template of Missy's
Mask of choice, the one i am using is Becky%5FMask042. If you know who this mask belongs to can you please let me know then i can give them credit, thank you
Filmstrip frame which was made by me and can be downloaded here
~Filters Used~
EyeCandy 4000 - Gradient Glow
Mura's Meisters - Tone
Xero - Radience
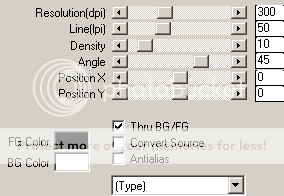
Penta.com - Color Dot
Dsb Flux - Bright Noise
~Font used~
Romance Fatal
Let's Get Started
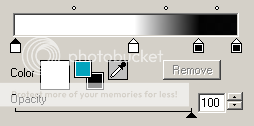
Open Missy's template in psp - image - canvas size - set to 850 x 800 - on the frame back layer select it with your magic wand - add a new raster layer - in your colour palette use two colours from your tube - select gradient - foreground-background - angle 45 - repeats 3 - fill the new layer with the gradient - copy & paste your tube as a new layer - position to your liking - selections - invert - hit delete - selections - none - duplicate the tube - on the original chnage the blend mode to Luminance (L) - on the duplicate go to adjust - blur - gaussian blur - set to 3.00 - change the blend mode to soft light - effects - plugins - penta.com - color dot
On the frame back 2 layer - select with your magic wand - add a new raster layer - flood fill with black - copy & paste your tube again as a new layer - position to your liking - selections - invert - hit delete - selections - none - effects - plugins - Xero - Radience
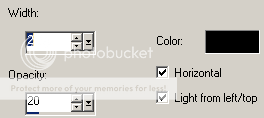
Effects - texture effects - blinds
Repeat these steps for the frame back 3 layerOn all the frame layers go to effects - plugins - dsb flux - bright noise
Add a drop shadow to each one of them - 1 - -1 - 4.00 - 4
Copy & paste the frame layer that i supplied as a new layer - move the layer down below the frame back layers - selections - all - float - defloat - add a new layer - flood fill with your gradient - selections - none - delete the original frame layer - with your magic wand select inside each of the frames - selections - modify - expand by 3 - add a new raster layer and move it below the frame layer - copy & paste your tube as a new layer position in the left frame {It doesn't matter if it overlaps into the next frame} - selections - invert - hit delete - selections - none - duplicate - image - mirror - merge together - duplicate again - on the original change the blend mode to Luminance (L) - on the duplicate go to adjust - blur - gaussian blur - same settings as earlier - change the blend mode to soft light - effects - texture effects - blinds - apply the same blinds settings as earlier. On the frame layer go to effects - plugins - gradient glow - change the glow width to 3.00 - change the colours to match your tube
Add the same drop shadow as earlier
Leave the black circles black and add the same drop shadow
Merge together the square layers - selections - all - float - defloat - add a new raster layer - flood fill with your gradient - add another new layer - effects - Mura's Meisters - Tone
Selections none - add a drop shadow to the gradient layer and delete the original layer
Copy & paste your tube as a new layer - position - add a drop shadow
Also copy & paste your wordart of choice {I added the Gradient Glow to mine} - position - add a drop shadow
Add a new raster layer and move it below all your layers - fill with black - layers - new mask from image - apply your mask - merge group - resize if needed
With your font add your name - position - effects - plugins - Gradient Glow - apply the same settings as earlier - add a drop shadow
Don't forget to add the artists correct copyrite - save tag and you are done!


